4. The Maschine MK3
The pages DECKARD adds to the MK3 (LFOs, the mod matrix, a step grid) and the buttons that work differently.
DECKARD runs the MK3 with its own controller layer. Almost every button does what the MK3 manual says. This chapter covers the exceptions.
At a glance
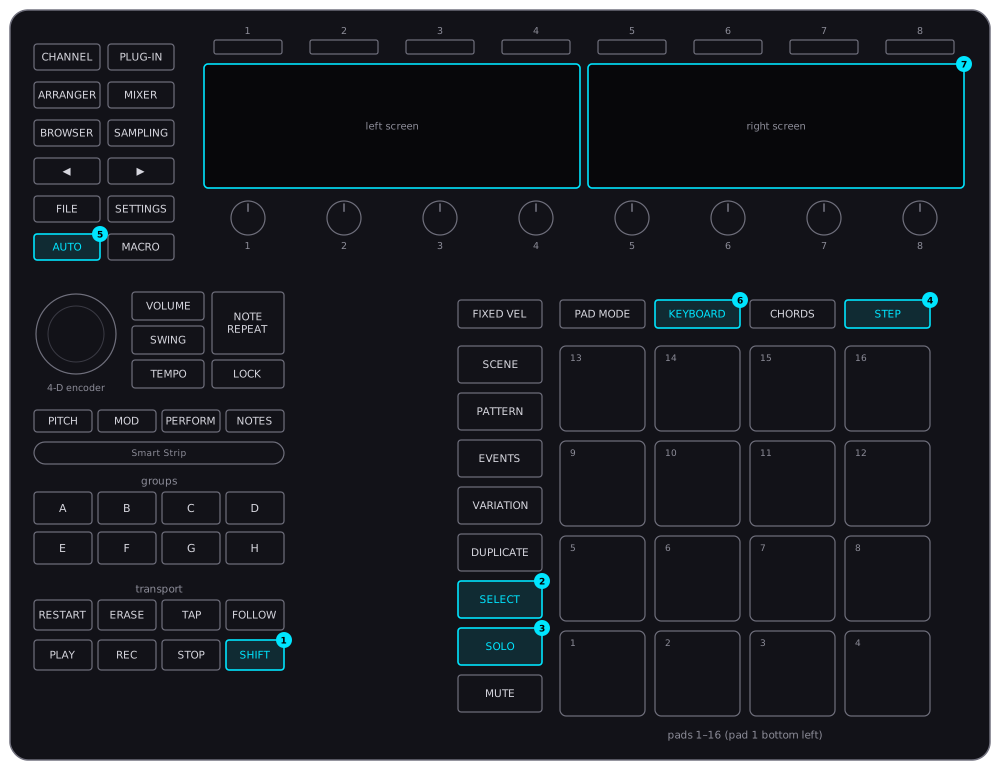
| Control | In DECKARD | |
|---|---|---|
| 1 | SHIFT | Opens the new pages with SELECT, SOLO and STEP. |
| 2 | SHIFT + SELECT | The LFO page. |
| 3 | SHIFT + SOLO | The mod matrix page. |
| 4 | SHIFT + STEP | The step grid. |
| 5 | AUTO | A switch, not a hold. |
| 6 | KEYBOARD | Two more knob pages: Pad Touch. |
| 7 | Screens | Drawn by DECKARD, in the theme you choose. |
Each new page closes the same way it opens: press the same combination again, or any other page’s button.
The LFO page
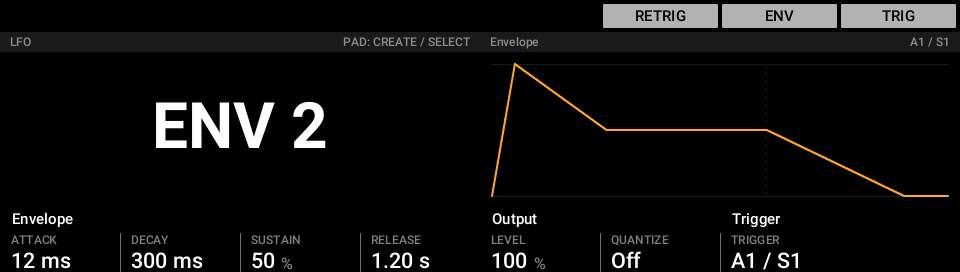
SHIFT + SELECT shows the project’s LFOs and envelopes. What they do is described in Modulation.
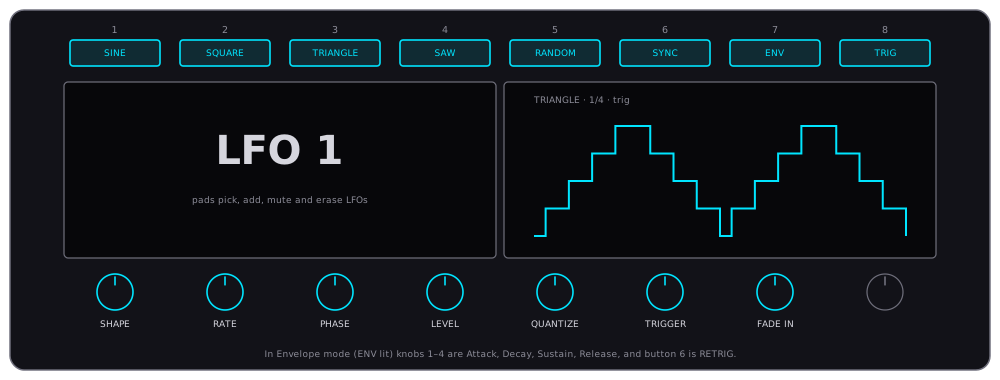
- Pads 1–16 are the 16 LFOs. A lit pad focuses its LFO. An unlit pad makes a new
one there.
- ERASE + pad removes an LFO.
- MUTE + pad mutes or unmutes it. Muted LFOs light red.
- Display buttons 1–5 pick the shape. 6 SYNC switches between tempo-synced and free (Hz). 7 ENV switches the slot to an envelope. 8 TRIG sets the trigger to the focused sound, or off.
- Knobs 1–7 set Shape, Rate, Phase, Level, Quantize, Trigger and Fade in.
- The left screen shows the LFO’s name, the right screen its wave.
In Envelope mode, buttons 1–5 go dark, button 6 becomes RETRIG, and knobs 1–4 set Attack, Decay, Sustain and Release.
The mod matrix page
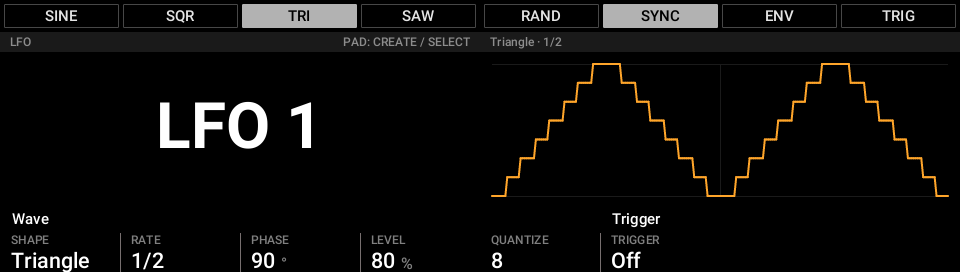
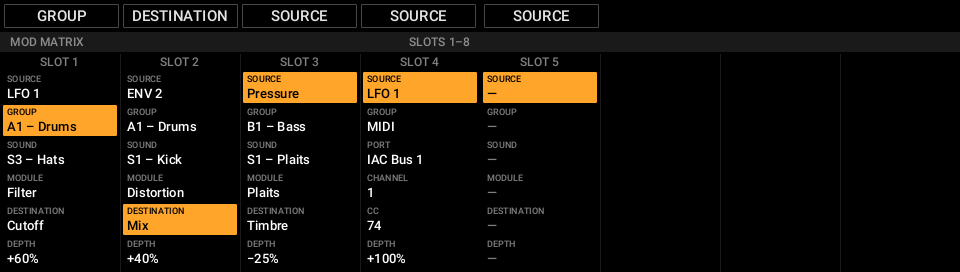
SHIFT + SOLO lists every modulation route in the project, one per column, eight at a time. What routes are is described in Modulation.
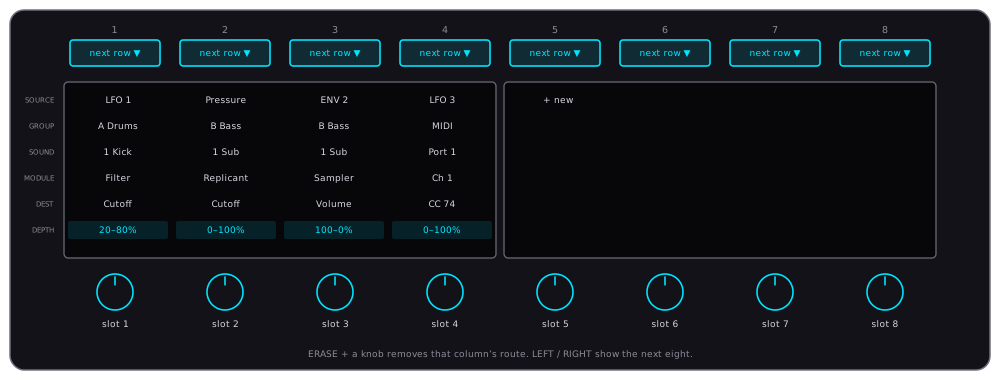
- Each column is a route, with rows Source, Group, Sound, Module, Destination and Depth.
- The display button above a column moves its highlight down a row. The page opens with Depth highlighted.
- The knob below a column changes its highlighted row.
- ERASE + knob removes that route.
- The empty column after the last route makes a new one. It becomes a route once it has a Destination.
- ◀ and ▶ show the previous or next eight routes.
To send an LFO out as a MIDI controller, turn Group past the last group to MIDI. The rows then read Port, Channel and CC.
The step grid
SHIFT + STEP turns the eight display buttons into steps, so the pads stay free to choose what each step plays.
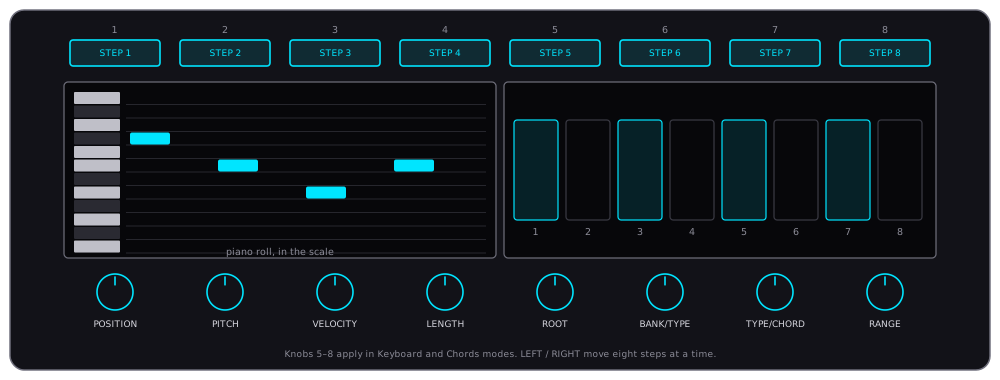
- Choose what to place with the pads:
- in PAD MODE, a pad picks a sound;
- in KEYBOARD, a pad picks a note in the scale (hold several for more than one), and the screen shows the piano roll;
- in CHORDS, a pad picks its chord.
- Press a display button to put that step in, or take it out.
- Hold a step’s button and turn knobs 1–4 to change its Position, Pitch, Velocity and Length. In Keyboard and Chords mode, knobs 5–8 set the root, scale or chord type, and which pitches the screen shows.
- ◀ and ▶ move eight steps at a time.
SHIFT + STEP again goes back. The usual Step mode (STEP on its own) works as the MK3 manual says.
AUTO is a switch
In Maschine, AUTO writes automation while you hold it. In DECKARD one press switches Auto-write on and the next switches it off, with or without SHIFT. While it’s on, turning knobs 1–8 records their movement into the playing pattern.
- ERASE + knob removes that knob’s automation.
- SHIFT + pad 10 (Clear Auto) removes the focused sound’s automation in the focused pattern.
Pad Touch on the Keyboard page
KEYBOARD’s knob pages have two more pages at the end. Page through with ◀ and ▶:
- Pad Touch: Mode (Velocity, Poly AT, Aftertouch or CC), Curve, Min and Max.
- Pad Touch CC: the controller number, for CC mode.
These are the focused sound’s settings. They decide whether pad pressure is recorded; see Pad pressure on the MK3.
Macros
SHIFT + MACRO opens Set Macro, as in Maschine: touch a knob to make it a macro. In DECKARD you can also turn the knob pages with ◀ and ▶ while Set Macro is open, and MACRO leaves it. A small macro icon marks the knobs a macro controls.